Use a disk on a linux server to store MacOS Time Machine backups.
If you use a Mac, Time Machine is a powerful, simple, and all encompassing backup solution that is built in to MacOS. Thanks to the Apple File System (APFS) and its filesystem snapshot capabilities, Time Machine backups are very efficient, perform well, and can be used to do a full system restore at a specific point in time in addition restoring individual files.
Attaching a USB hard drive as a backup target is the simplest way to get started with Time Machine backups, but server backups are, in my opinion, the most convenient for the long term - no cables or drives cluttering my desk and anytime I’m connected to my file server via wifi, the automated backups will still run.
I’ll be using Fedora 35 Server Edition as my backup server for this blog post, but be aware that other Linux distros will have slightly different commands.
Steps
- Partition and Format Drive
- Create Backup Directory and Assign Permissions
- Install Packages
- Enable Services
- Edit Netatalk Config
- Add Firewall Rules
- Setup Time Machine
Partition and Format Drive
I have a spare hard drive that I’ve dedicated to Time Machine backups that I’ve installed in my file server. The drive’s name is sdf.
I’ll first partition it.1 I prefer GPT because it’s newer and the larger capacity drives it can support2.
parted /dev/sdf

(parted) mklabel gpt
(parted) mkpart timemachine 2048s 100%
(parted) quit
Format the new partition to the XFS file system and label the drive “timemachine” to further identify it as a Time Machine backup drive:
mkfs.xfs -f -L timemachine /dev/sdf1
Now that my drive is partitioned and formatted, I can move on to the next step.
Create Backup Directory and Assign Permissions
I’ll make a timemachine directory right in the root and assign it permissions. When I configure the Time Machine client, I’ll give it the credentials for the karl account, so I’ll set permssions on the directory for read,write,execute for the user and group, and nothing for others.
mkdir /timemachine
chown karl:karl /timemachine
chmod 770 /timemachine
And I’ll add it to mount upon startup
lsblk /dev/sdf1 -o UUID
UUID
972cee60-9806-442b-af28-f7247fa9796c
echo "UUID=972cee60-9806-442b-af28-f7247fa9796c /timemachine xfs defaults 0 0" >> /etc/fstab
mount -a
Install Packages
dnf install -y netatalk avahi
Enable Services
systemctl enable --now netatalk avahi-daemon
Edit Netatalk Config
vim /etc/netatalk/afp.conf
Add a section for your Time Machine:
[NAS TimeMachine Target]
path = /timemachine
time machine = yes
Restart the netatalk and avahi-daemon services.
systemctl restart netatalk avahi-daemon
Add Firewall Rules
I need to open ports 548,5353,49152, and 52883, both TCP and UDP on the firewall.
firewall-cmd --permanent --add-port={548,5353,49152,52883}/tcp
firewall-cmd --permanent --add-port={548,5353,49152,52883}/udp
firewall-cmd --reload
Setup Time Machine
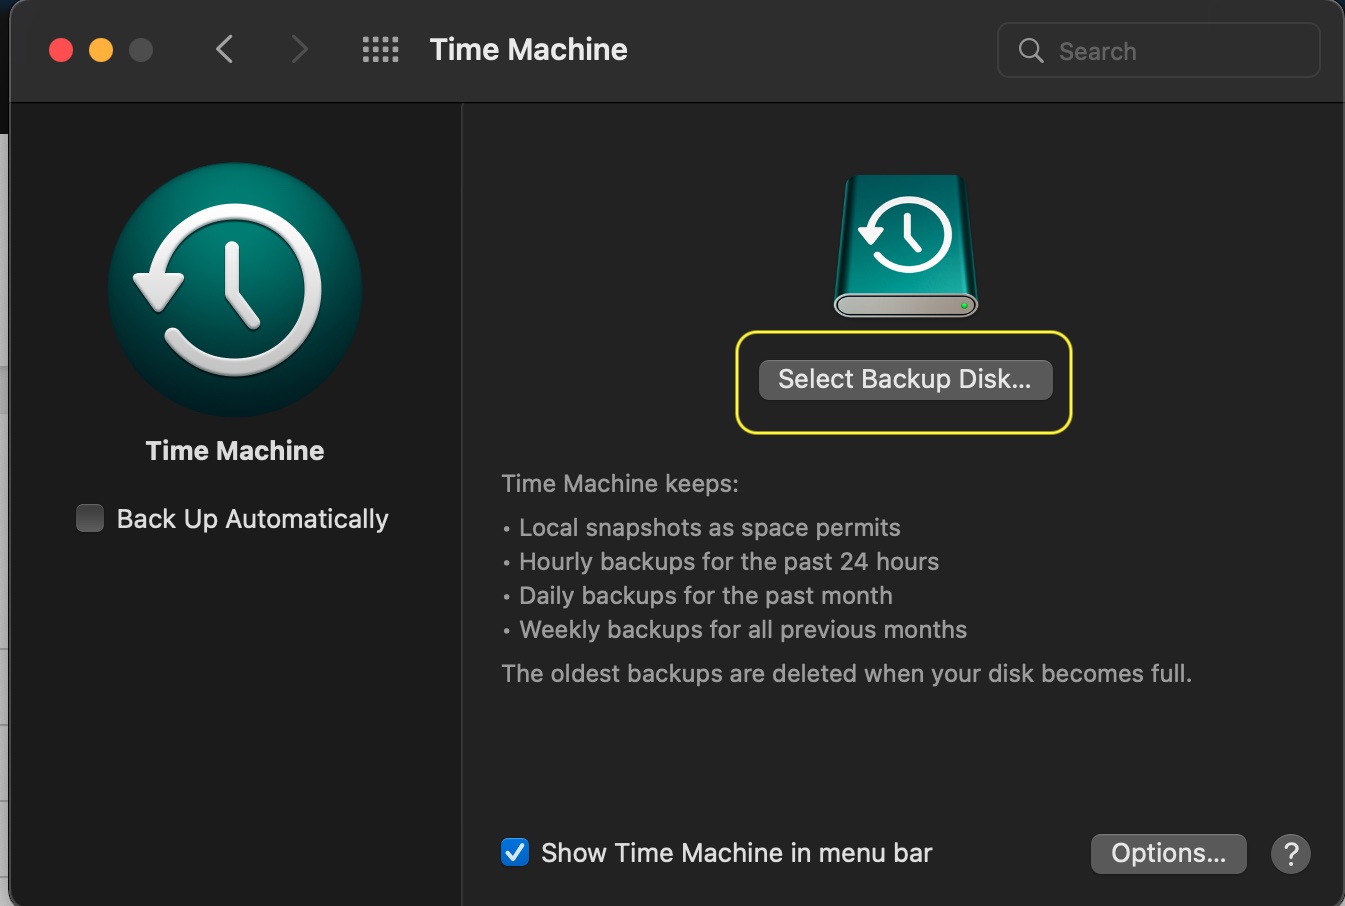
Now, on your Mac, you should be able to open the Time Machine settings in System Preferences and use Select Disk… to pick your new Time Machine backup drive.
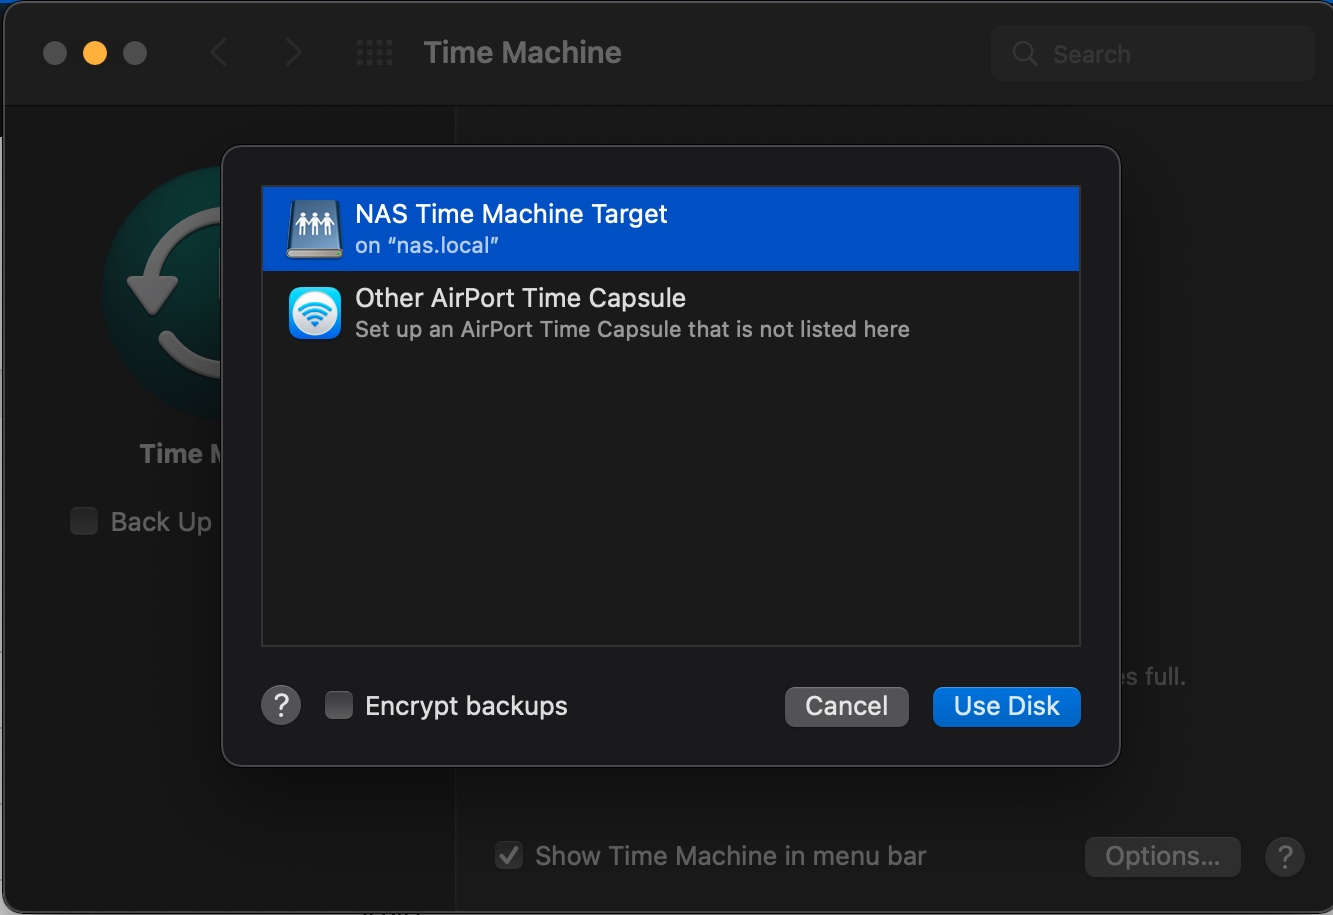
The share that’s configured in the afp.conf file should be available to select. Select the NAS Time Machine Target on the server and click “Use Disk” and then “Connect”
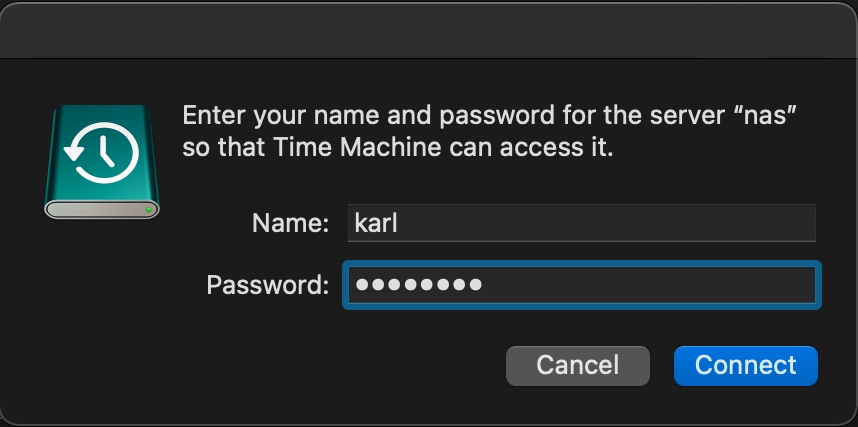
When prompted, enter a username and password of an account on the linux server that has permissions to the /timemachine directory.
Once you’ve selected “Backup Automatically” the Time Machine client will automatically take a backup every hour, as long as it’s connected to the server.
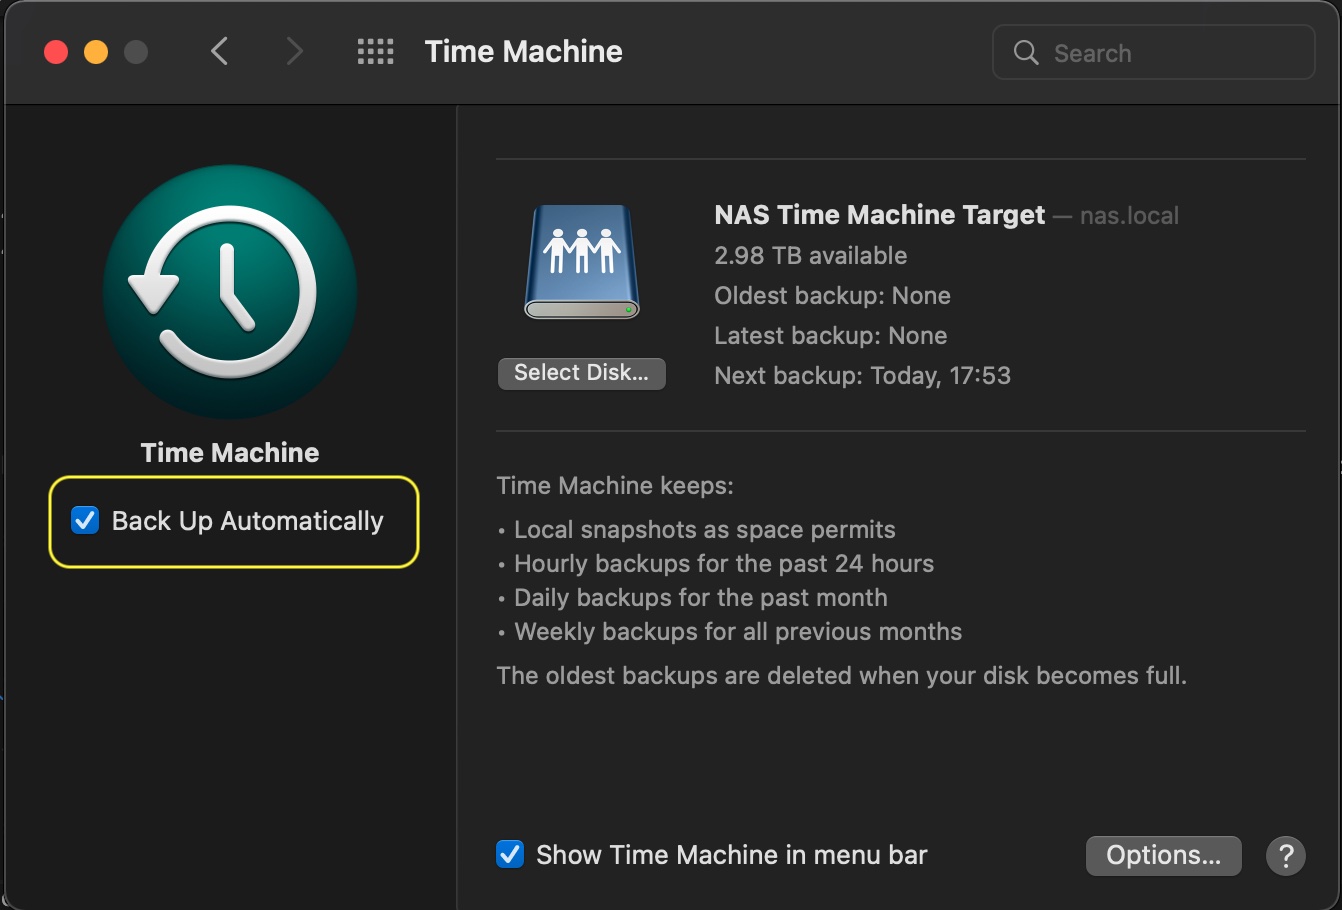
Unfortunately, there isn’t any other option to configure if you wish to manage the backups. Backups are stored according to the scheme below:
Local snapshots as space permits
Hourly backups for the past 24 hours
Daily backups for the past month
Weekly backups for all previous months
The oldest backups are deleted when the disk is full
The last part is why I dedicated a disk to backups. If I shared the disk with something else and didn’t set a disk reservation, I could run the risk of something else consuming the space that the backups need.
If the disk is shared you can, however, limit the space Time Machine consumes by adding this to the /etc/netatalk/afp.conf file:
vol size limit = 500000
the number is in MiB, so 500000 is 500GiB